Instructions
Free code set for testing
Send us an email to if you are interested in a free code set to try out code assignments. We are happy to hear from you.Download app
Buy a code set
A code set consists of 25 individual codes with numbers in ascending order. On the platform, this number is known as control number. Single or multiple code sets can be bought in specialized shops dedicated to bee keeping accessories (please only consider quantities suitable for an average mid-sized business). Each set is valid in the year it is purchased as well as in the subsequent year; after that, code sets expire and need to be purchased again.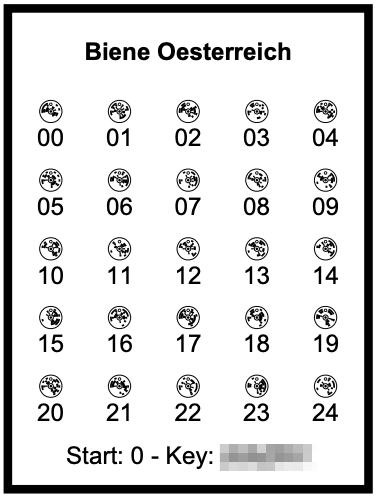
Attach code
It is not required to comply to a certain code order; all codes are equally well suited. Before attaching a code to a bee queen, it is recommended to first scan the code to ensure proper detection of the code (in case a code is damaged in some way). To scan codes, use the dedicated smartphone app for Queen-Codes.A single code can be easily pulled from its base frame by utilizing a suitable tool like a pocketknife or a Stanley knife in order to attach it onto the back of the bee queen. After that, ensure that the code can still be scanned properly.
Assignment (Preparations)
A code can be assigned to an individual queen bee either prior or after it has been attached to the queen bee itself. Nevertheless it is recommended to first attach the code onto the queen bee and only after that, assign it on the platform. This ensures, that only working codes are assigned.To connect a queen bee to an individual code (assignment), use the control number that is printed below each code. This number is encoded in the code itself and will be detected upon a successful scan.
A control number needs to be interpreted in order to get its real value. In order to to so, sum the start value that is printed on the code set and the number below each code in order to get the complete control number. Considering the given example the code in the first row on the far left has the control number 0 (Start: 0 + 0) while the code in row 4, column 3 would be 17 instead (Start: 0 + 17). Always use the sum of the values (control number) when you enter the code number on the plaform during an assignment.
Create assignment
For each control number, one has to decide how to use it in the context of the platform. Essentially, there are two different methods:- Internal assignment on the Queen-Codes platform itself
- Assignment on Queen-Codes with an additional connection to an external database
Besides a control number and the key, additional notes can be added to each assignment. To allow additional members to access dedicated data attached to the assignment, additional access rights can be granted to certain users as well.
All successful assignments can be viewed at any time by its owner.
Internal assignment only
This method of assignment can be completely created on the platform itself by issuing an internal assignment. Simply follow the instructions on the plaform.Assignment with additional external database
This type of assignment will be connected to breeding data that is hosted by an external database. Databases that cooperate with Queen-Codes have a special link/button integrated into their system that allows to connect with Queen-Codes.As the first integrated external platform, "Beedata" offers this kind of feature. Use the method described below:
- Visit the external website on Beedata
- Search for an individual queen bee that should be assigned on Queen-Codes
- Click on the link/button provided (you will then be forwarded to Queen Codes)
It is only possible to create an assignment with an external database, if a suitable authorization exists. For that, the account email that has been used on the website of the external database needs to be added to the Queen-Codes account (in case they differ). Thus one of the reasons an assignment fails might be different email addresses. Ensure that you to add a different email address as an additional account email identity on the Queen-Codes platform. Each added email address is only valid after it has been properly verified by the separate email that will be send.
Unlock assignment (optional)
By default, each assignment is only visible by the person that created the assignment. To extend an assignments reachability, each assignment can be equipped with additional email addresses. The owner of each email address is then granted access to the the profile data from the owner of the assignment.Additional email addresses will be added as a list, whereby the addresses themselves need to be separated by a comma. This method allows to easy transfer grant lists between different assignments.
Grant lists can be modified even after the assignment has been created.
Create extended grants (optional)
If you do not own an assignment, you can still give access rights to it as long as you are authorized to do so. Prior to assign extended grants, ask the owner of the original assignment for proper privilige. To gain privilage you need to be added to the grant list of the assignment. This can only be done by the creator/owner of the assignment itself.Remove assignment (optional)
Each stored assignment can be deleted at any time. When doing so, please consider, that some data might be in use by other people. Hence try to do your best to keep the impact low when you delete data. Each assignment older than 5 years will automatically expire since this duration equals the maximum expected lifespan of a queen bee.Add profile data
Every registered user of the platform can shape its own profile data. All data entries will be shown once an assignment of a certain a user is requested. Please be aware that there are certain key factors that could prevent the data to be shown e.g. if the queen bee that is associated with this assignment is currently under breeding examination.By default, only the person that created an assignment will be able to see the profile data (that is essentially the same person). All other people need to be referenced by adding them to the list of grants.
For privacy reasons, it is recommended to keep the entered profile data at a minimum.
Download stickers (optional)
To attach the control number directly on a bee hive, one can download stickers that match to a given control number, print them and use them on the hive directly. Stickers can then be scanned with the smartphone app as usual.Scan assignment
Each created assignment can be scanned by using the dedicated smartphone app. In order to scan the code attached on a queen bee, a macro lens (with 10x magnification) is required. This lens needs to be attached in front of the smartphone camera. Scanning stickers does not require such a lens.Description of a typical scan procedure:
- Install the app on your smartphone (if not already done)
- Attach the macro lens (not required for stickers)
- Start the app
- Target the code within the rectangle and keep the smartphone still until the code is recognized
Scan feedback
Due to the wide range and the ever increasing number of different smartphones and cameras, scan problems for certain devices seem to be inevitable. Therefore, please help us to increase the number of supported devices.The following list of devices has been tested successfully:
- Samsung A40
- Samsung Galaxy A6
- Samsung Galaxy S8
- Samsung Note 4, Android 6.0.1
- Samsung X Cover 4s
- Samsung Galaxy S5
- Xiaomi MI Note 10
- Xiaomi MI Max 3
- Huawei P10 lite
- Huawei P20 Lite, Android 8
- Huawei Mate 10 lite
- Nokia 7.2 (Android One)
- Sony Xperia XZ3, Android 9
- HTC U11 EYEs Android 7.1.6
- OnePlus Nord
To gather feedback within the app, use an external computer monitor to scan codes; alternatively, it is possible to print a certain code first. For both cases, please ensure that the diameter of the code is always at least the size of a 2 Euro coin. For the feedback, it is recommended that you only use the codes provided in the playground section of this page.
Before you proceed, please ensure that all of the above conditions are met.
Gathering feedback:
- Remove any macro lens that might be in front of your smartphone lens. Codes used for the feedback need to be large enough so they can be easily read without an additional lens. As such, do not use small codes that are attached to a queen bee.
- Start the feedback by pressing the dedicated feedback button within the camera's view finder screen of the app
- Try to scan a fully covered, clean code (target the code within the rectangle and wait until the camera has finished focusing)
- As soon as the code appears to be fine end the feedback by pressing the dedicated button that is shown on the interface
- Follow any subsequent steps on the screen and finally send the feedback
Important notes on privacy: Prior to sending the feedback you are warned that certain camera parameters as well as images captured during the feedback process will be send to the Queen-Code servers (and thus leave your device). Therefore, please do not point your camera to any sensitive content that you might not agree to share. By sending the feedback data, you agree that the provided data will be analyzed and used to improve the app.
Playground
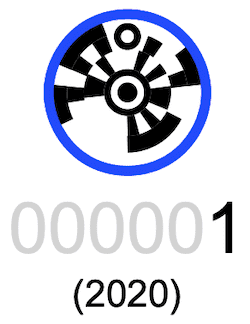
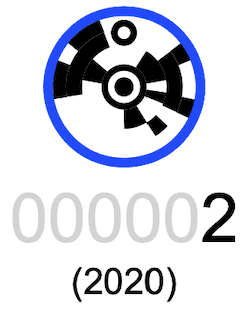
Below are three example codes that you can use to try out the Queen-Codes app. The control number is shown below each code.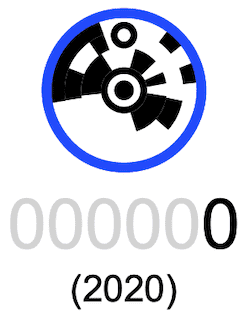
Special: Tutorial for breeders
Using Queen-Codes has the following advantages:- Queen bee tracking
- Reduction of fraud after selling a queen bee
- Specific data for a queen bee directly on your smartphone
- Better control in case a queen bee is lost (to achieve breeding aims)
- Control of anonymous bee colonies under test (recognize various mistakes)
- Reclaim of distributed queen bees for sale
- Easier detection of queen bees within a colony: white/black colors only
- Affordable and easy to use
Stickers need to be printed by the bee keeper with a laser printer (using label Herma 8338). Each PDF that needs to be printed can be selected on the Queen-Codes website. Because there might be some loss of bees (up to 30%), it is preferable to print each sticker set twice.
Virgin queen bees should be labeled prior to putting them onto mating stations. One of the stickers should be placed on the mating box directly while a second sticker should be given to the buyer or be placed onto the beehive/hive-label.
The assignment in the Queen-Codes database happens after the queen bee is received from the mating station. By using the Android app one can check if the controlnumber of the bee and the one of the sticker are identical.
Now it makes sense to proceed with the assignment. Basically, there are two different ways to add a controlnumber for Queen-Codes. Breeding organizations like the "ZAC" (Carnica breeding community) use the "BeeData" database operated by "Biene Österreich" (for self or non-self testing). Please see this manual for additional information.
All other queen bees are added directly into the Queen-Codes database. When scanned, the smartphone shows information about the controlnumber, additional profile information of the breeder as well as various notes. For further information about the app, please see this link.
Breeders that use the "BeeBreed" data format, should use bulk assignments as this is the most efficient input method. If a breeder adds a buyer to the "Unlock for..." field, the buyer can access that assignment set as well. It is further possible, to add additional grants by the buyer himself. This is especially useful, if one person buys queen bees for a group of people. In this case, the buyer adds each group member and therefore grants access to the assignment. This is also useful, if a bee colony is sold.
A short description on how to attach code labels on a queen bee is further described here.